Menu Home About Tutorials Style Shop Buttons

Monday, May 14, 2012

DIY Shoe Makeover Round Up

I spent some time over the weekend looking up ideas for ways to bring new life to shoes. I think it sounds like a fun summer project and a good way to use what I've got and not spend money on new shoes. Here are some of my favorite ideas. Click through to go through Pinterest to the tutorial.


I just wonder how long these embellishments last. Is the glitter going to flake off? The spray paint? Will the fabric fall off? Anyone have any experience with anything like this?

Saturday, January 8, 2011

Refashion #11 Flowers on the Collar

When the Shade clothing company was having their going out of business sale, I got this shirt for $3. I tried it on over my clothes at this big warehouse sale where the mirror was at an angle. It was a little wide, but I thought a belt would do the trick.

Little did I know, it looked like a tent on me. The shoulders made me look like a football player. Yuck. Something had to be done.

My mom helped me remove the sleeves and I used the fabric to make flowers to adorn the neck.

I used 4 templates of a variety of sizes to cut the circles. The largest is about 2 inches.


Cut the circles out of the fabric.


Fold a circle in half three times and cut off the corners. Make them nice and rounded and even.


When you open it up it it will look like a flower.


Repeat for all sizes of circles.


Stack the flowers, largest to smallest. For the large flowers I used all four and for the small ones I used the smallest three sizes.


Stitch each flower onto the collar of the shirt, sewing a pearl bead to the center. I alternated the large flowers with the small flowers.


It needs a good ironing, but it's a brand new shirt!


For winter I can wear a long sleeve white t-shirt underneath, and when it gets warm again I will switch to a short sleeved shirt.


A belt at the waist gives the shirt some shape.


Bad hair day!


I also like it with my favorite blue cardi.


Do you have anything in your closet that doesn't fit well? Could you make a simple change like this so that you'll wear it again?

Tuesday, December 28, 2010

Refashion #10 Lace Knee Socks Tutorial

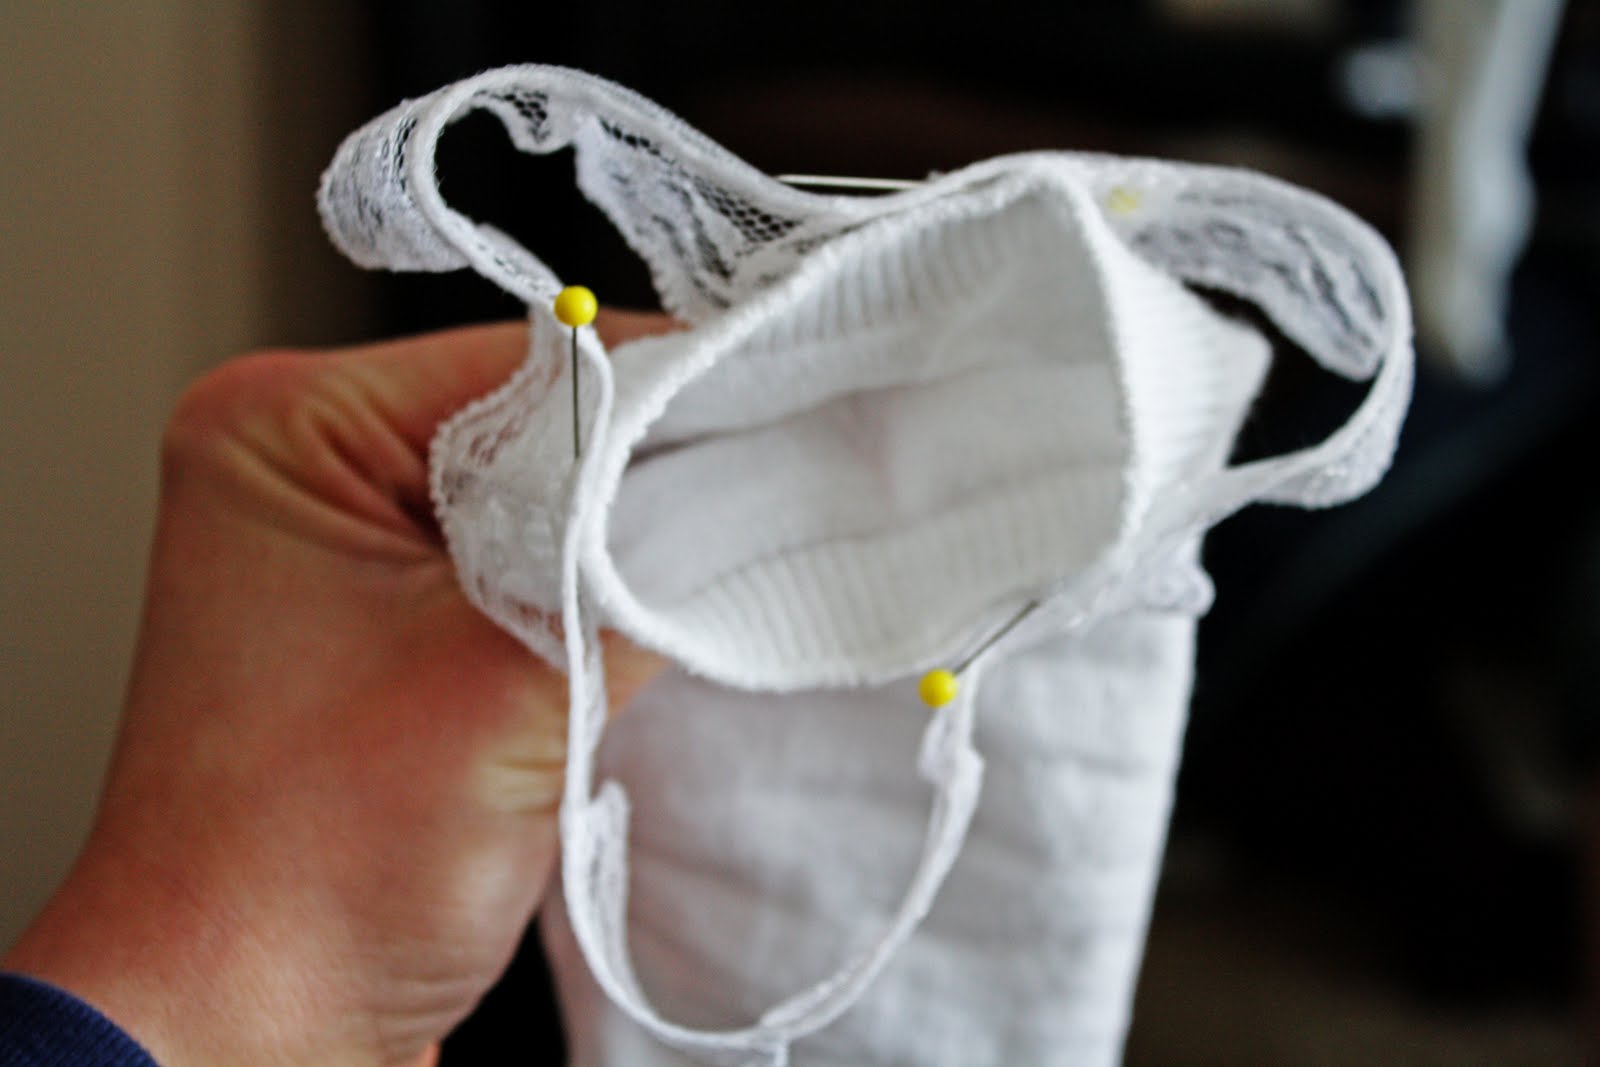
Have you seen this new trend of wearing knee socks with boots? I think it is kind of fun, especially the lace socks. However, I have seen them for $24 in the boutiques. Yikes! That is expensive for a pair of socks and I am really trying to cut back on spending and shopping! What's a girl to do?
I have had these socks in my drawer for awhile now. We bought them for my husband for his conquistador Halloween costume. As soon as the party was over he said, "Ew! Girl socks!" and they have been in my sock drawer ever since. I have finally found a use for them!
For this project I bought 3/4 yard of lace trim at Walmart for $.73 (the socks are from Walmart too- they were around $2.00). I was just a fraction of an inch short on lace. I would recommend that you buy 1 yard.

Start by putting the socks and CAREFULLY pinning the lace on the sock. I started in the back so that the "seam" wouldn't show as well.

CAREFULLY take off the socks when you have finished.


If you don't use a sufficient number of pins- it will look like this. You can stretch out the sock and pin it down better if this happens.


It should look more like this.

Using a matching thread, stitch all the way around the sock. Back stitch at the beginning and end.

BE SURE to pull the sock really tight as you are sewing. Otherwise the lace won't look right when you are wearing the sock.


Clip the extra threads and make sure that everything looks good. If you don't have a machine you could probably do this by hand- just make sure the sock is stretched out during the stitching!


Ta da! Wear your new socks proudly! These cost around $3.00- saving you $21.00.


You could make socks in a variety of colors with varied sized lace. Other trims could be fun too!


These are the new boots I got for Christmas- "Zaney" by Madden Girl. Oh how I love them!
The dress is from Target.

Be sure to let me know if you make any socks! I would love to see them and feature you!


Thursday, November 18, 2010

Turning a Dress into a Shirt

A few weeks ago I was at Old Navy and saw this dress on sale for $.97.
I already owned a similar item- a shirt in the same print but in pinks (as seen in this post). I had purchased that shirt for $5, which I thought was a deal so $1 was a steal! I coudn't pass it up.
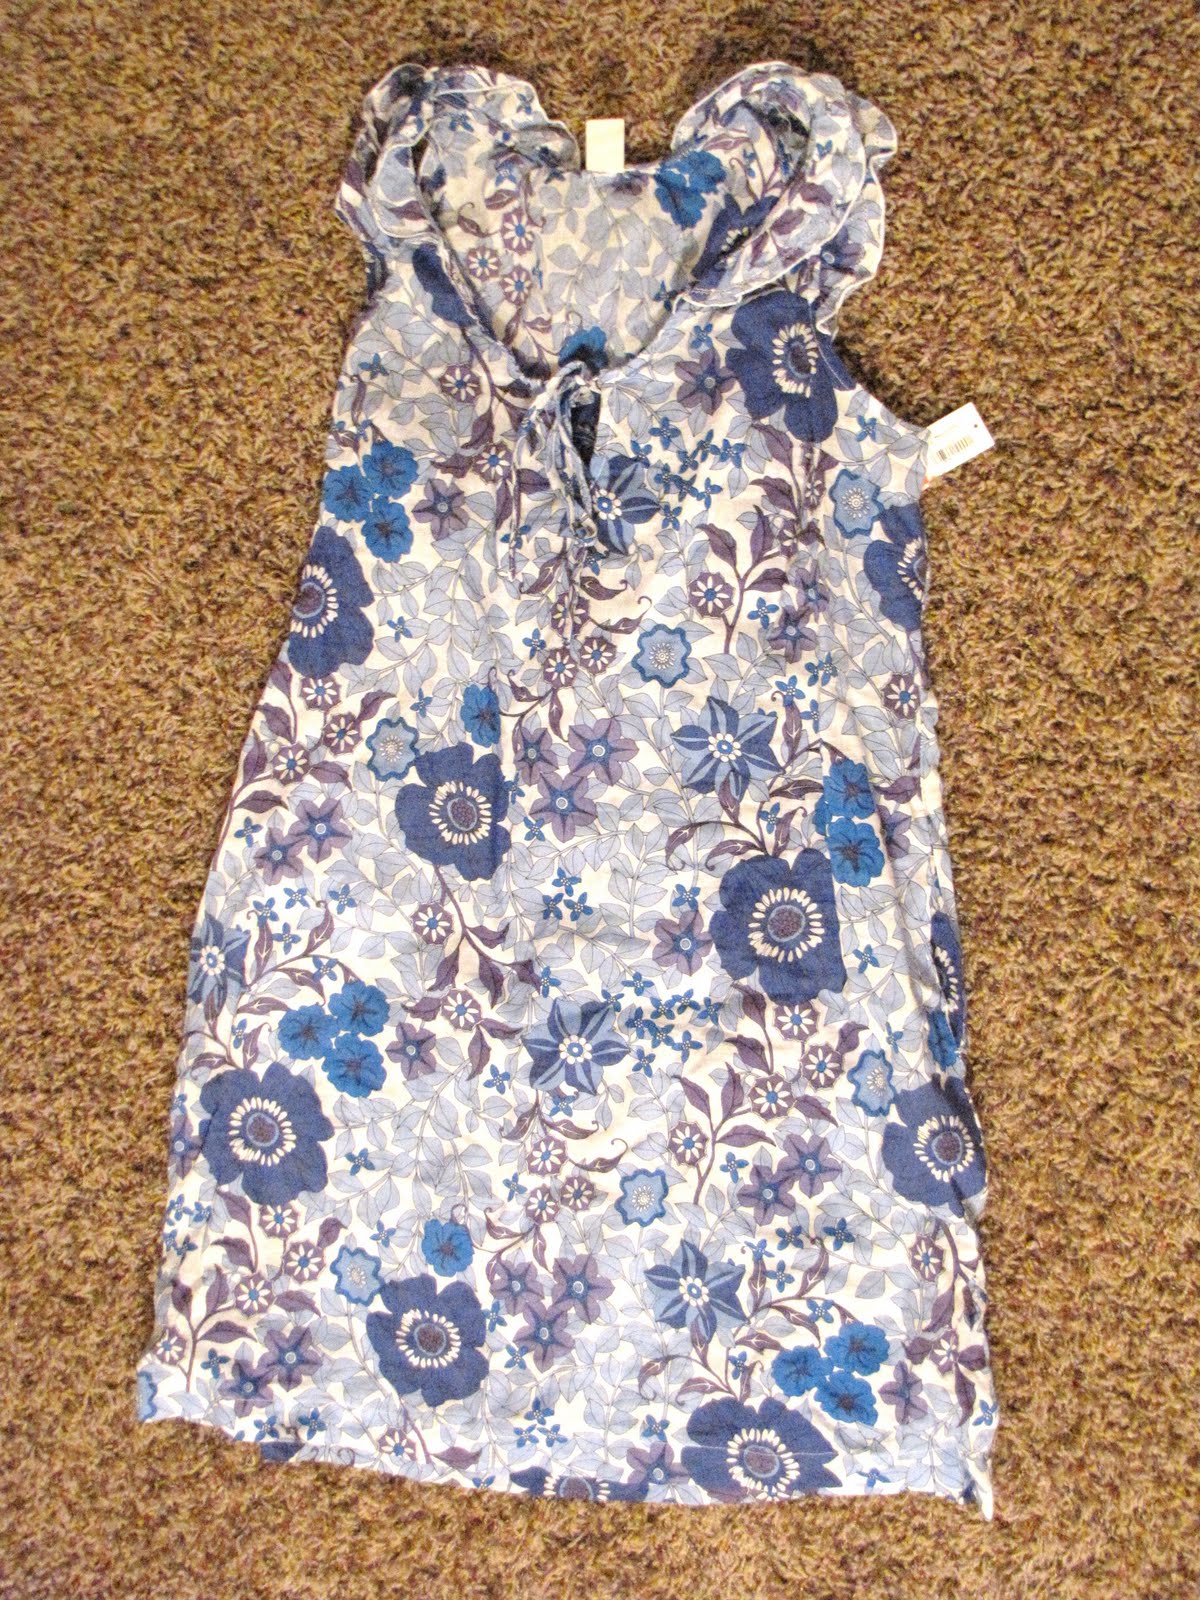
It's too short for me to wear as a dress but too long for a shirt. I thought it looked easy enough (for my mom) to hem up.
First, measure up as high as you want the hem to be. Mark all the way around the dress with a pencil.

Cut along the line you just drew.

Stitch a basic hem.


Voila! A cute $.97 shirt.


Great for warmer weather with just a t-shirt underneath.


I can also wear it this winter with my new fave sweater over the top. But you know me, I'll totally have to add a belt to it for the outfit to be complete!


Now I have a small section of this cute printed fabric left over. Any ideas on how it could be used?
Thanks, Mom!

Wednesday, November 3, 2010

Refashion #9 Anthro Inspired Rose Shirt

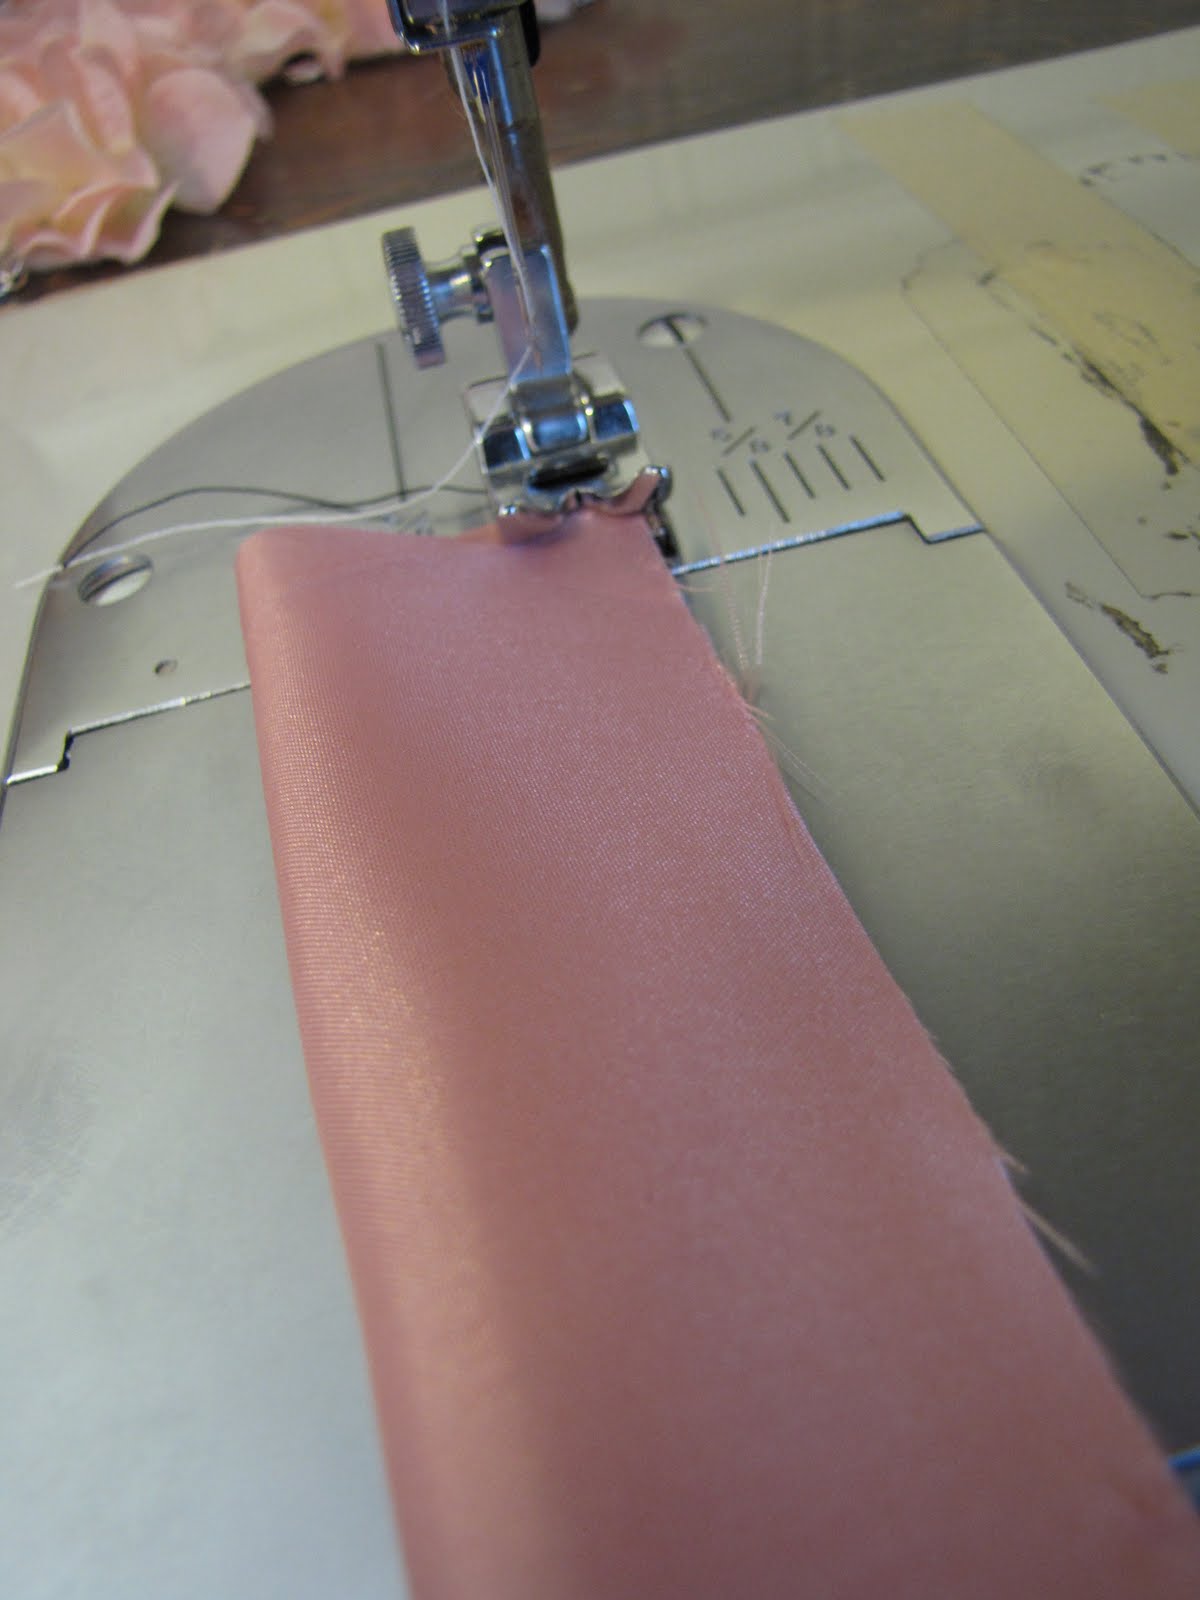
I am so excited to share this next refashion project with you. I am in love with this beautiful rose shirt that I just finished.

It was inspired by this "Telocote Tank" by Anthropologie, which is no longer for sale.
I loved the beautiful roses but I didn't like the price tag (around $70), or the tank top. I decided to make my own more modest version. (Which was less than $10, plus hours of work, of course.)


Let's get started!


Materials:

Plain shirt

Your choice of fabric and colors

(I used 1/4 yard each of maroon, beige, and pink for the flowers and a small amount of brown for the leaves. This fabric is 100% polyester and kind of shiny.)


Cut 2 1/2" wide strips from the flower fabrics. Fold in half and stitch a seam down the side. (If you are using a fabric with a pattern, make sure that wrong sides are together for this step.)


As you can see, I didn't even use matching thread because it won't show. I don't rethread my machine if I don't have to!


Using a pencil to help if needed, turn the sewn fabric inside out (or outside in!) to make a long tube. This is done to prevent the fabric roses from fraying. They will also look thicker.


Roll up each tube of fabric to make a rose. Use fabric glue or a needle and thread to secure each one.


For the leaves cut a few 4"x4" squares from the brown fabric. They do not have to be straight.


Fold in one corner to the center...


and then the other.


Pinch the end together to hide the edges and make a leaf shape.


Stitch the ends together to finish the leaf. They won't show so they don't have to be perfect.


Arrange the flowers on your shirt in a pleasing pattern. Tuck the leaves under the roses. Pin each one on so they stay while you hand sew or glue the flowers onto the shirt (see the end of this post for my tips on this).
Each flower will have to be sewn to the flower next to it so that they don't stretch and pull apart when the shirt is worn. I just did a few stitches through the sides of the flowers to connect them together.

This is the longest step!!


After sewing on all of the flowers you will end up with a beautiful rose shirt like this one!


There are so many other color combos that would look wonderful!


It is perfect for fall with my maroon "leather" jacket and brown boots.


Just FYI

When you are going to do a shirt refashion, make sure that the shirt is exactly what you want before you start to add embellishments. I started this project with a very plain $5 Old Navy tee. Once the flowers were on they looked a little too fancy for the shirt. The neck was also very large so the white undershirt gaped out and looked funny. This shirt isn't too different, but it gathers a little at the neck, has the 3/4 sleeves, and has a small neck opening. It was also $5 from Shade.

If you choose to use fabric glue to attach the flowers, beware! I used it before to attach flowers on this shirt and it worked fine. However, on the rose shirt it made a big mess. The glue was running so I grabbed the nearest thing I had to wipe it up with, which just so happened to be a piece of red cardstock. Yikes. Needless to say, there is a pink stain on the back of that Old Navy tee. Not to mention that the shirt was stiff.

After these messes, I pulled all the flowers off and hand stitched them to the Shade shirt. This entire process took me several months to complete so that is partially why I am so excited to share this! It's FINALLY done!

I will be linking up to many of these parties. Please check them out!
 

©2011 All Rights Reserved | Website Designed by Website Design Credit

Powered by Blogger