Menu Home About Tutorials Style Shop Buttons

Monday, February 13, 2012

Origami Heart Valentines


Hi Friends! Just dropping in to share my last minute Valentines. While I planned on making cookies (red velvet mmmm....) for our parents and siblings for Valentine's Day, I didn't think I would be doing anything else. Then I saw this adorable video tutorial on how to make origami heart Valentine's. I shared it with my Facebook followers the other day, then decided to make a few myself for my friends at work. It only took a few minutes using my scraps of leftover Valentine scrapbook paper and stickers from past projects to make these. They are so cute! Just don't be too jealous of my mad night time last minute photography skills!


I hope you have a great Valentines day. It's going to be epic over here.

Monday, December 26, 2011

Yellow and Gray Photos

How was your Christmas?? I hope it was amazing! I had a wonderful day! I was so exited to give the gifts I made. Here is one of them...

A good friend of mine has a ggorgeous pinboard of gray and yellow home decor. One pin in particular shows a black and white street scene with just the [yellow] leaves in color. I recently completed a 6 week Photoshop course and I felt confident that I could make that for her for Christmas. I used photos that I took myself (two of them are from the tulip photo walk I did with Amber so that was kind of special I guess) and some Photoshop tricks to make these:


I gave her a 4x6 of each photo, the files on CD (sans watermark of course), and a gift card towards future printing and framing when she gets her dream gray and yellow room.

I am sorry that I don't have a tutorial for you. I used a different process for each photo and am not savvy enough to write PS tutorials. Try looking here for instructions.

Most of the rest of this week will be a year in review. I will be featuring my top 10 favorite tutorials, outfits, and even books I read. I do have a few more Christmas gifts I made that I will try to post here too. And lucky for me I received a lot of Christmas gifts that will help me be creative and have even more fun stuff to post!

Tuesday, December 6, 2011

Handmade Gift Exchange


Once again I participated in Linda's handmade gift exchange over at Craftaholics Anonymous. My partner this year was Melissa from Sew Cute by Melissa. She sent me these adorable Christmas blocks. Aren't they fantastic? I love the papers and colors she chose. They match the colors of my decor really well. I put them in the window of the dining room... and area that could use a little Christmas love.


I sent Melissa a few accessories to get her holiday party ready: a sparkly green necklace, some red hoop earrings, and some black rose shoe clips.

A big thanks to Linda for hosting and to Melissa for the great gift!! Be sure to hop over to CA to see the other gifts that were made!

Friday, December 2, 2011

Photo Letters Again

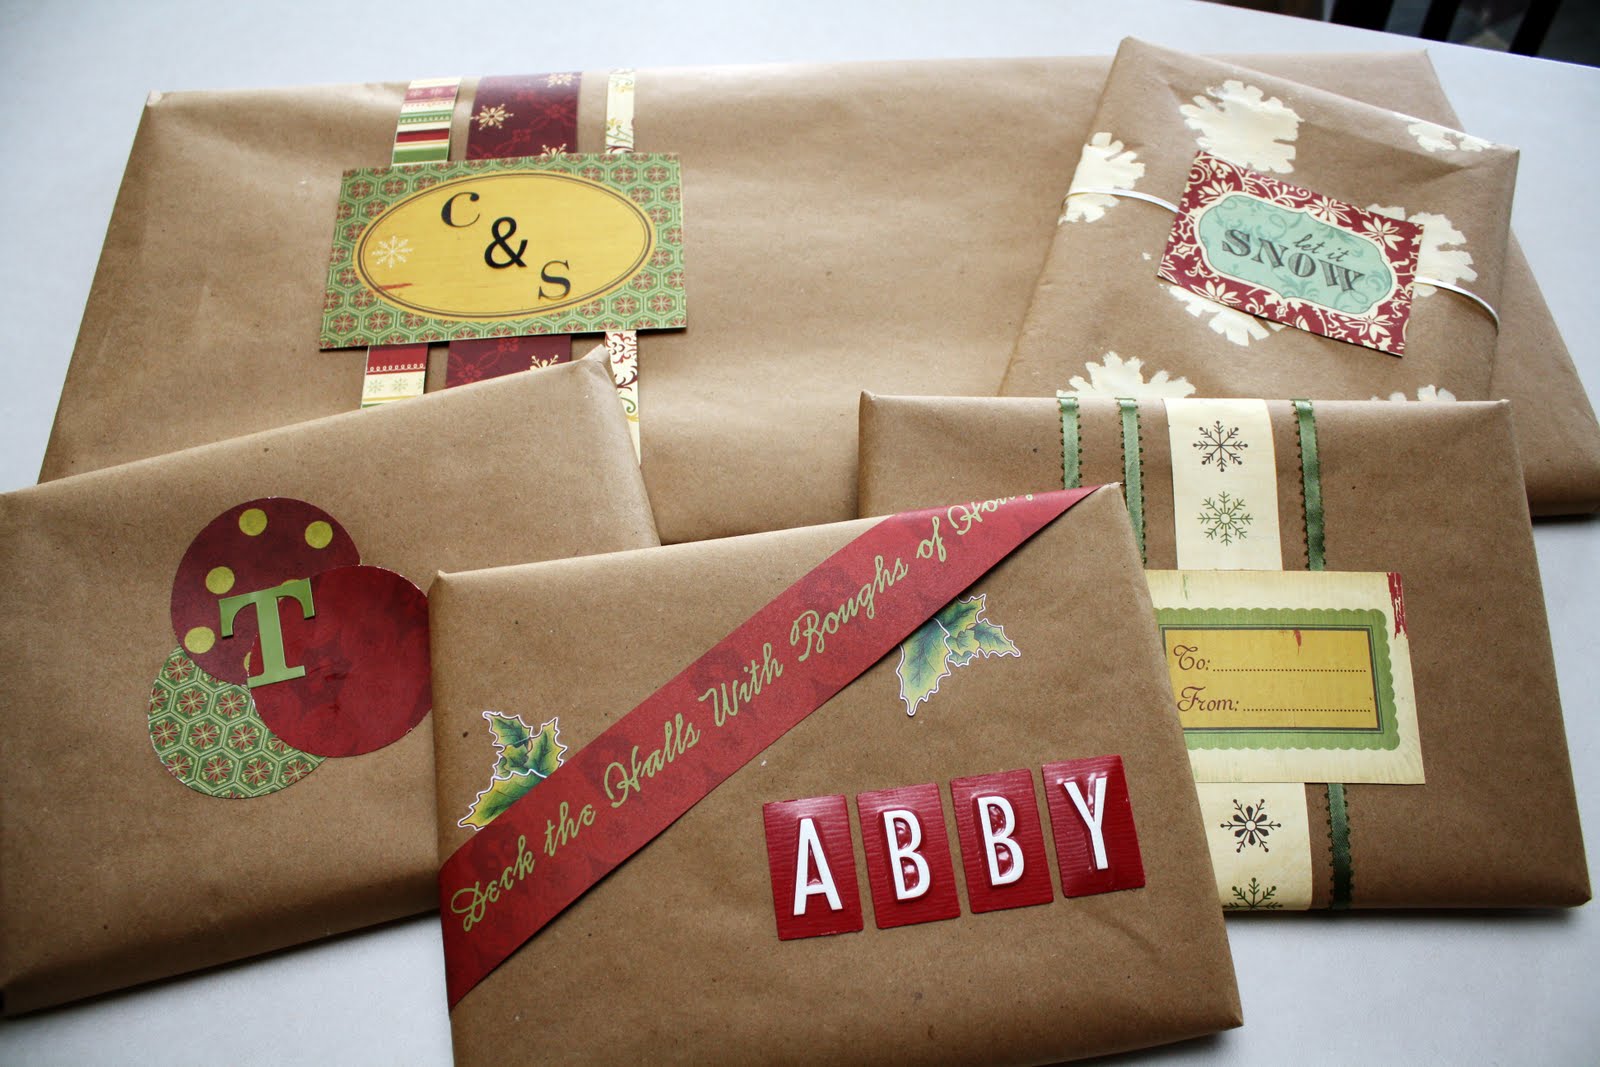
Have you been dying all week to know what was in the brown paper packages? Today is the day to find out!

Remember the photo letters gift I made for my brother last year? I decided to do the same thing for Spencer's sister's family this year. We had their names for the family gift exchange and I really wanted to make something and have it be personal.

For the mom and dad gift we I did the family name in larger frame.

For each of the kids I made a 5X7 collage of their first names in Photoshop and framed it. I was going to tint the letters to match the colors of their rooms but it only looked good in some of the colors so I left them all black and white.


Unfortunately, the printing turned out a little dark on this one, but it isn't as bad in real life as it is here.

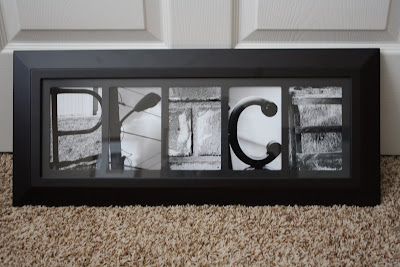
This one is my favorite! I had such a hard time finding the mailbox B last year, that I was worried about finding another B, but it wasn't too bad. Funny, that I drove past the new B everyday last year when I was looking and never noticed it.


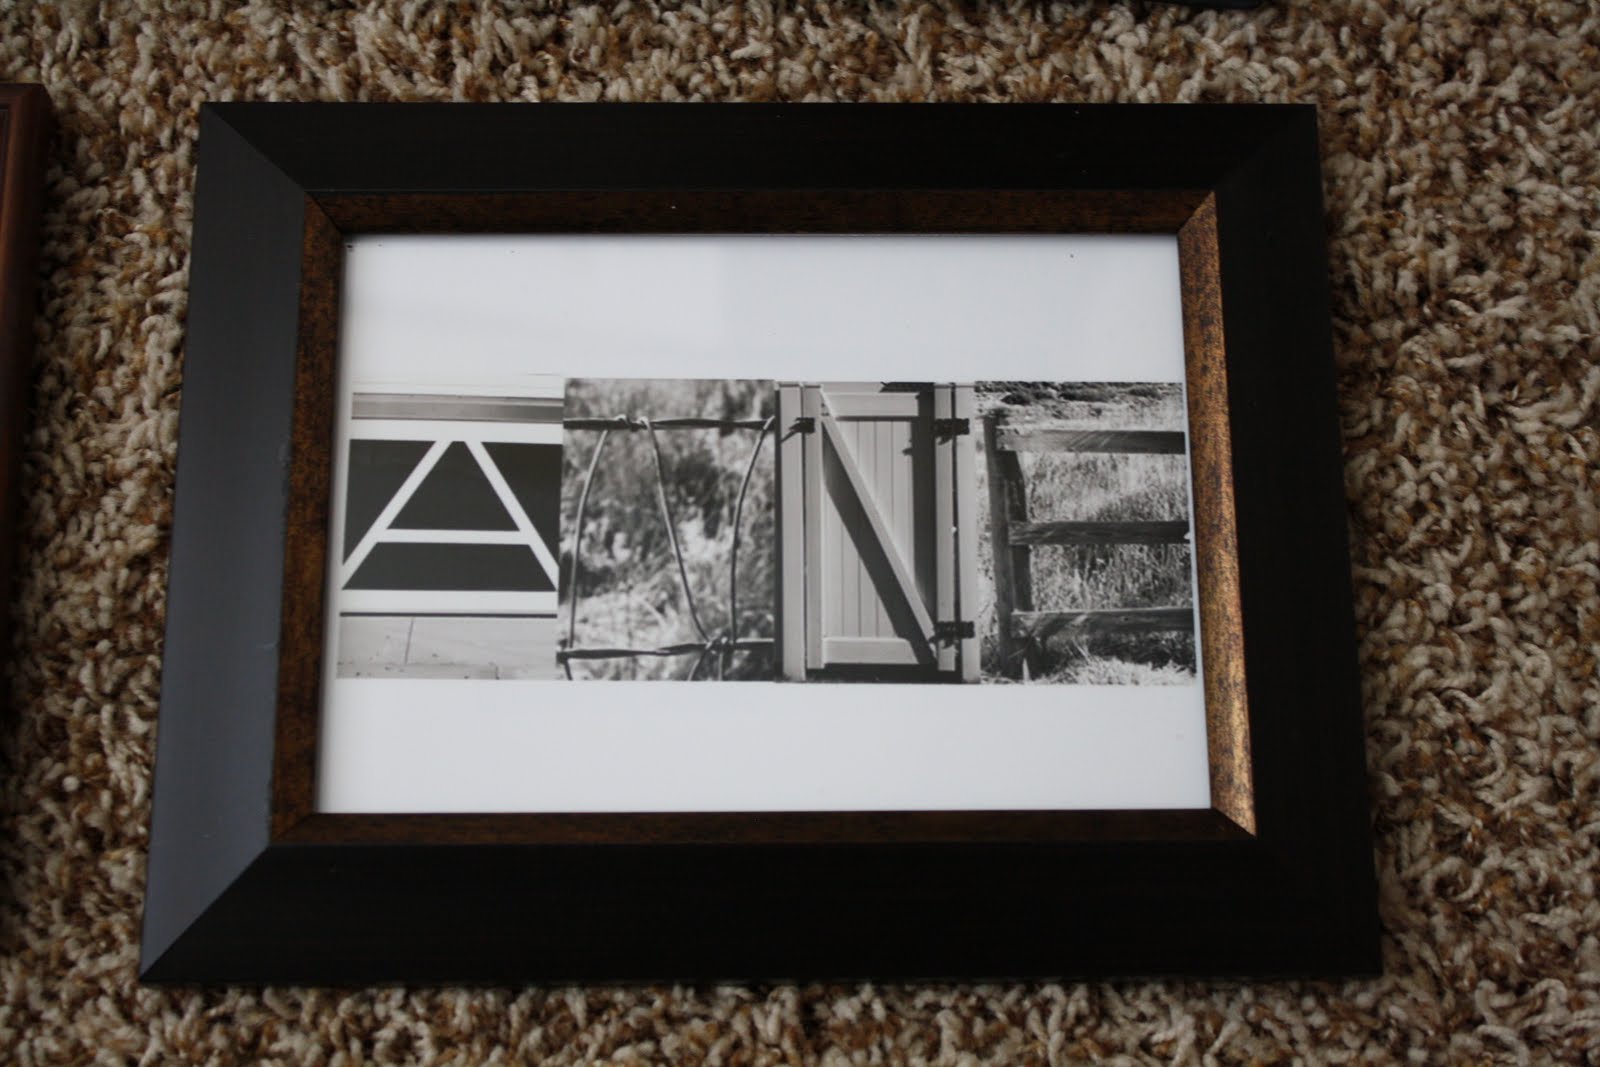
This was easy since Tanner and Anne are almost the same! :)

If you are still looking for a unique and personal gift, there is still time to make one! Just keep your eyes constantly peeled for objects that look like letters and soon enough you will find all the letters you need. Actually, finding the 5 opening frame was hardest part. After going to every store in the tri-county area (ha ha) and tons of websites I found this one at Bed, Bath, and Beyond. See my post from last year for a few more tips.

Have fun!!

Monday, November 28, 2011

Embellished Brown Paper Packages


Wrapping gifts is not one my talents. Most of the time my presents come out looking horrible. I tend to stick with gift bags (usually ones that someone has already given me, including the tissue paper!). This year I decided to skip all the wrapping paper and bows and go with simple brown "Kraft" paper as my blank canvas. Now I can be creative and have fun!

I had to make these particular gifts flat without much dimension because I was sending them home on a long road trip over Thanksgiving weekend with Spencer's sister's family and I didn't want the wrappings to get squished.

If you want to make your gift all coordinate, consider buying a few sheets of matching scrapbook paper, stickers, and a little bit of ribbon. All the paper I used was from the same line so the gift somewhat go together.


This one turned out to by my favorite. I used a simple strip of paper with the word lyrics, some neat letter stickers, and some holly leaf stickers. So quick and easy, yet personalized and cute!


This one used another strip of the paper and a few strands of ribbon that are each taped to the back of the package. The tag came printed on the paper. After the photos were already taken I filled in the to and from.


The present for Anne is the first one I did, and obviously I was more ambitous at the beginning. I painted the snowflakes on the package using a stencil. I added a ribbon and another tag cut from the paper. I finished it off with letter stickers to spell out the name of the recipient.

This was for a nephew (rather than the other three for nieces) so I figured I could go a little more simple. I punched three circles out of coordinated scrapbook paper and added a simple sticker for a monogram. I love putting monograms on gifts and tags. It's easy and stylish.


For the parents I used the same ideas as above- strips of paper, a tag cut from paper, and monogram stickers. I like it.

I still have some wrapping paper left that I will use this year (probably for Spencer's gifts) but from this point forward I am going to stick with the brown paper. It can be customized for any person on any occasion!

I want to show you what's in these packages, since I made the gifts. I don't think anyone in that family reads my blog, but if you do, be warned that later these week I will be posting photos of the gifts and don't want to spoil your surprise! : )


Add Image

Thursday, July 7, 2011

Handmade Gift Exchange

I participated in the Handmade Gift Exchange over at Craftaholics Anonymous. I was lucky enough to be partnered with Courtney from Crafty Project Girl. This is what I got:


Two chalkboard coasters

A book cover in just the right colors

And this beautiful green scarf just because she is nice. It looks just like the green scarf from that movie Confessions of a Shopaholic!

I sent Courtney a Blooming Sash belt and a pair of earrings. I sure hope she liked it. I loved my gift. Thanks Courtney! And thanks to Linda for hosting!

Monday, May 30, 2011

Quick and Simple: Charms (Mother's Day Gifts)

This is a bit late in posting, but for Mother's Day this year I made these charms for all the mom's in my life. I put beads on headpins, attached them to a metal ring and attached the ring to a lobster clasp. Now she can put it on whatever necklace she wants. My mom got the pink bird one and wore it with some other charms and it was super cute. I made each charm around the personality and/or favorite colors of the receiver.

This is a great idea for a simple gift that you can make right out of your bead stash!

I wrapped them very simply by putting them in clear jewelry bags with handmade paper roses (find the tutorial here) as an alternative to a bow.

Wednesday, February 2, 2011

Half-birthday

My birthday is in July. I have never got to celebrate it at school. It was always forgotten as a student, and even now as a teacher. Until now. My sweet sweet friends at work had a half-birthday party for me this year. I got to have cake and even got some presents. Everyone gets a nice card and pretty handmade bracelet. It's fun to do at lunchtime.

But I got the sweetest bonus gift. My cute friend Ashley had done some paintings and shown then on her blog. I said how cute I thought they were and how it would look cute in my bedroom so she painted me my very own for my half- birthday!


Isn't it so cute? She says she is not an artist, but this is what creating is all about!


I rearranged the items on my beadboard headboard and it looks so cute front and center!

Thanks Ash!

Bonus points if you counted how many times I said "cute" or "sweet" in this post!

Thursday, December 30, 2010

Photo Letters

For a Christmas present I made this photo collage that spells out the family's last name. It was so much fun to make! I became much more observant as I drove around looking at objects trying to find letters hidden in every day things. I drove past some of these things everyday for 2 weeks before I finally saw the letter.
My friend who is an artist/photographer gave me a few tips:
1. It looks much cooler when you actually tell what the object is (which you can for all of mine except the 'S').
2. Increase the contrast on the photos in Photoshop or other photo editing software. This makes the letter stand out more.
I have seen similar postcards with photo letter on them for sale at craft stores but it was much more fun (and meaningful) to take the photos myself.
Be sure to choose a name with which you will be able to find a frame with the right amount of spaces. OR use small individual frames. They would also be a lot of fun in wallet size. First names would be fun for kids or teens. You could also do initials or first name monograms.
Another option would be to use sepia colored photos. It just depends on the decor. This family decorates with black, white, and red so the black and white was the best option.

Sideways mailbox


Light post


Tree knot


Basketball hoop


RR crossing sign


A swirly peice of metal on a fall decoration I have.


Now I just need to make myself one! Luckily there are only 6 letters in my last name!

Monday, December 13, 2010

Star Necklace Tutorial with Free Printable (100th post!)

This is my 100th post!
This year I wanted to make a small Christmas gift to show my appreciation for a few friends. I wanted it to be meaningful and purposeful without going over the top. I came up with this simple star necklace to represent the star the wise men followed to find the baby Jesus. Keep reading to find out how you can give this gift too.
Materials:
Chain
Star charms (I used the package from Blue Moon that has 6 or 7 stars on it, but only one star is still in the packaging in the picture.)
Headpins
Clasp
Jump rings
Small pearl, clear, or silver beads
Jewelry pliers (not pictured) Cut chain the desired length. I cut mine to about 20 inches.


Using jewelry pliers, pry the jump ring open, attach the star charm, and attach to the chain.


Put the pearl or other beads on a headpin. Use round-nose pliers to bend the wire and make a loop.


Trim the loop, attach it to the chain or jump ring, and close the loop.


It should look like this so far...


Finish attaching the beads- as many as desired. I don't have a picture of this step, but use jewelry pliers to pry apart another jump ring. Put the clasp on the ring, add it to the chain, and close the jump ring. Put a jump ring on the other end of the chain so the clasp has something to hook to.


Make more necklaces if you wish to give this to multiple friends. The Blue Moon package comes with a variety of stars to make each necklace unique. Many of the women I will be giving these to have pretty conservative styles so I didn't want to make the necklaces too flashy.
Plus, it takes away from the message and spirit of the star, just like too much commercialism can do to Christmas.


I created a card that would fit inside a jewelry bag and was able to print 6 on a page (see below to get your own copy.)


I cut them apart, and made a slit with a craft knife right under the scripture reference for the star charm to poke through. I then taped the rest of the chain to the back of the card so it wouldn't fall out of place.


I put the necklace in a plastic jewelry bag and now have a cute, meaningful, handmade, Christmas gift.


I am really excited about this gift. I wanted to make something for these ladies, but I also wanted to celebrate the real reason for the season- the birth of the Savior. I feel this is an appropriate way to bring the two together.


Here is the tag if you want to use it. The way it should work is that you should click on the image to make it full sized. Then right click (or control + click for Mac users) to save or download the image for your own use. It is a .png file.

If downloading the picture doesn't work, just email me (aubreelarsen [at] gmail.com) and I will send you a copy.
Thanks for reading. I hope you are having a very Merry Christmas!


©2011 All Rights Reserved | Website Designed by Website Design Credit

Powered by Blogger