... and Book Page Hearts 2


Source: meholder.blogspot.com via Aubree on Pinterest
Source: omgdiywedding.blogspot.com via Aubree on Pinterest
Source: kindawonderful.typepad.com via Aubree on Pinterest
Source: cheekymagpie.com via Aubree on Pinterest
Source: whimsicalworldoflaurabird.blogspot.com via Aubree on Pinterest


 I think I (husband) will hang it up by putting a nail through the center of the flower where it can't be seen.
 First, I want to show you these cute favor boxes that my mom and I made. I took pictures as I was making them so I could do more of a tutorial post, but they disappeared and I have no idea why. But luckily it is a very simple process, ha ha:
 Anyway, I think the boxes really added to the table. The center pieces arranged by my mom were so pretty, but the roses just tied it all together.
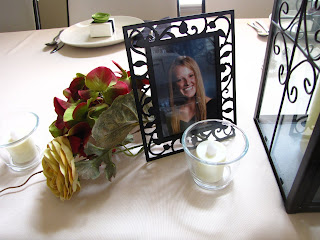
 My mom used laterns and candles for the center pieces (we always use battery powered candles because of my dad's asthma). She purchased these frames at the dollar store and put pictures of the bride and groom as children in them. (No, we did not marry my kid brother off. This is a picture of him from junior high, I think.) The flowers also look really pretty. We matched them to the paper to make the roses.
 For the head table, my mom used a larger lantern and doubled the display with a more recent photo of the bride and the groom.
 My mom purchased the tablecloths so she went with a neutral color so they could be reused. We borrowed plates from my mother-in-law that had been used at my wedding, borrowed the goblets, and used nice looking but plastic silverware.


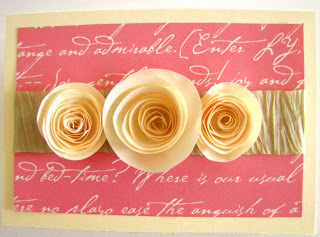
 I then made the roses from red cardstock using this tutorial I have linked to before. I don't draw the spiral, I just cut it and round the corners off.
 I cut a green leaf from some handmade paper I had in my stash, and attached the roses to the cards.
 I also had a lot of these cute little metal wedding sayings I had been given so I could attach them to the cards at no cost.
 I am very pleased with how they turned out. They are pretty, cheap, and not time consuming. (I made 10 of them in less than 2 hours.)
 I have added my first card to my Etsy shop! I have been making cards for years and have finally added one to the inventory list. It is perfect for the upcoming Valentine's holiday, or can be used for a wedding, anniversary, new baby girl, etc.!


