Menu Home About Tutorials Style Shop Buttons

Wednesday, November 3, 2010

Refashion #9 Anthro Inspired Rose Shirt

I am so excited to share this next refashion project with you. I am in love with this beautiful rose shirt that I just finished.

It was inspired by this "Telocote Tank" by Anthropologie, which is no longer for sale.
I loved the beautiful roses but I didn't like the price tag (around $70), or the tank top. I decided to make my own more modest version. (Which was less than $10, plus hours of work, of course.)


Let's get started!


Materials:

Plain shirt

Your choice of fabric and colors

(I used 1/4 yard each of maroon, beige, and pink for the flowers and a small amount of brown for the leaves. This fabric is 100% polyester and kind of shiny.)


Cut 2 1/2" wide strips from the flower fabrics. Fold in half and stitch a seam down the side. (If you are using a fabric with a pattern, make sure that wrong sides are together for this step.)


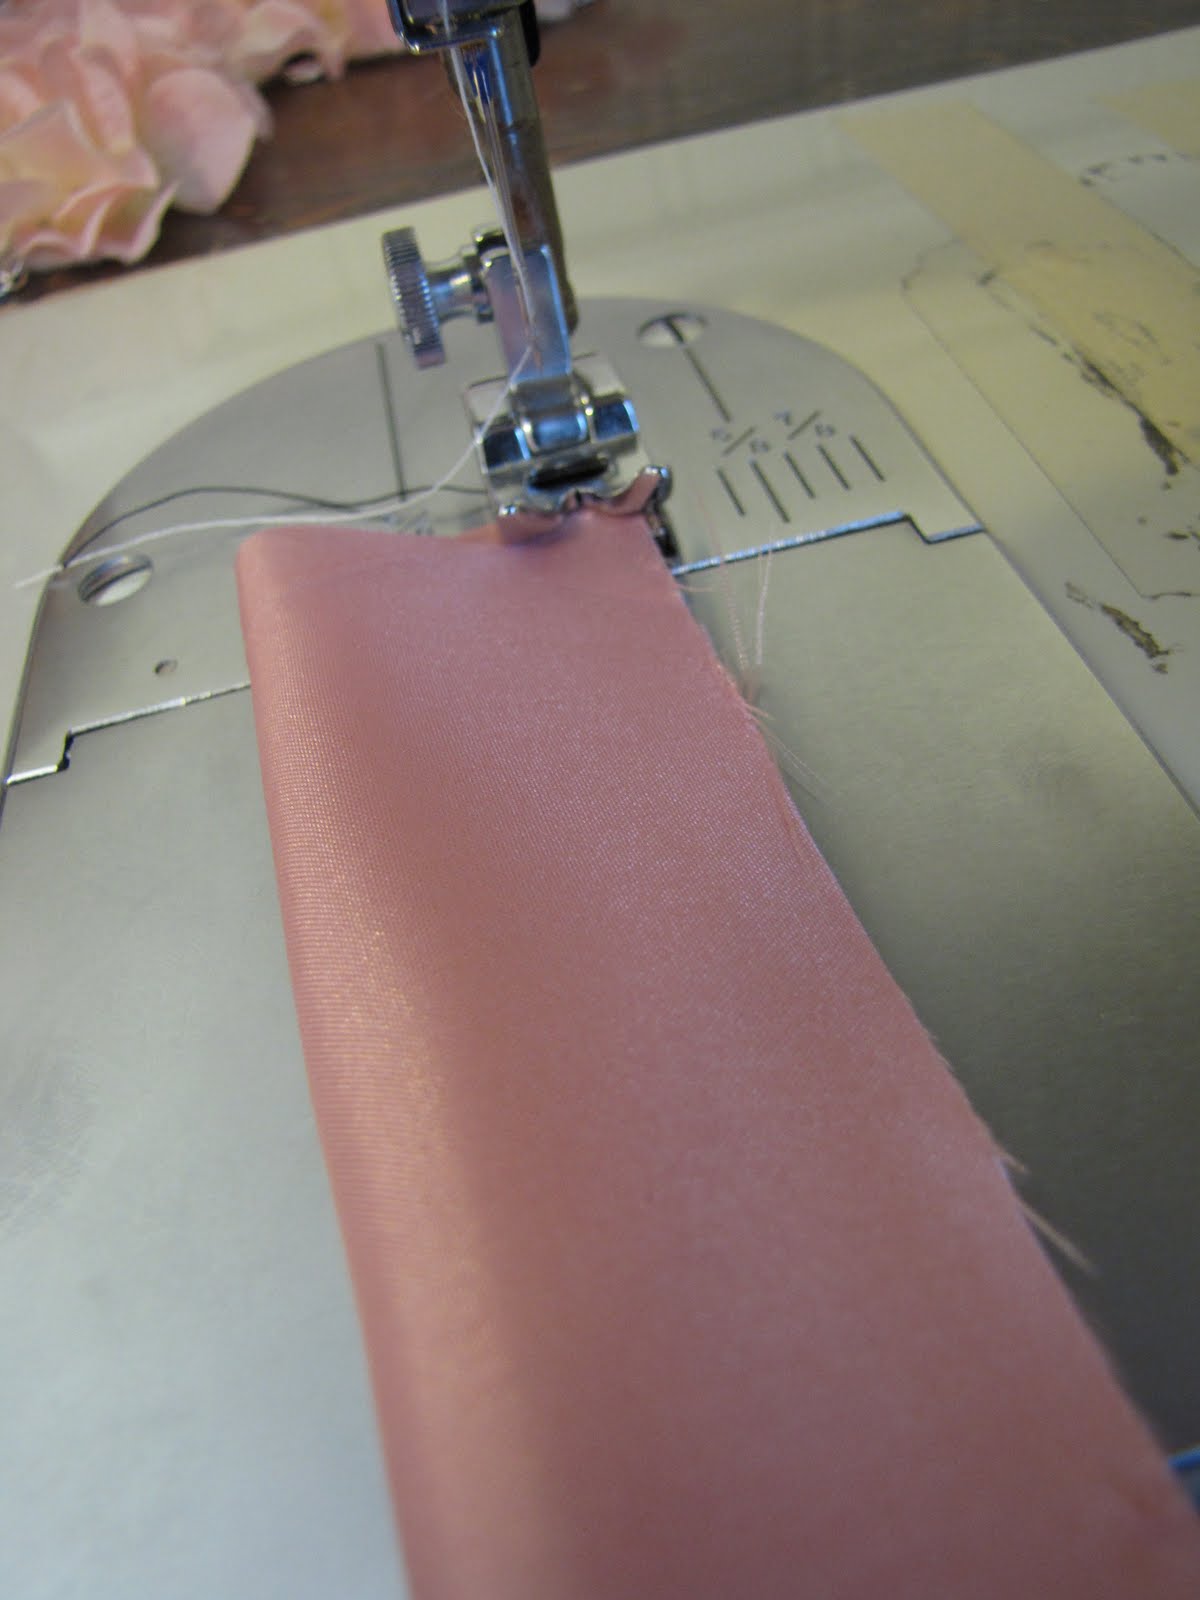
As you can see, I didn't even use matching thread because it won't show. I don't rethread my machine if I don't have to!


Using a pencil to help if needed, turn the sewn fabric inside out (or outside in!) to make a long tube. This is done to prevent the fabric roses from fraying. They will also look thicker.


Roll up each tube of fabric to make a rose. Use fabric glue or a needle and thread to secure each one.


For the leaves cut a few 4"x4" squares from the brown fabric. They do not have to be straight.


Fold in one corner to the center...


and then the other.


Pinch the end together to hide the edges and make a leaf shape.


Stitch the ends together to finish the leaf. They won't show so they don't have to be perfect.


Arrange the flowers on your shirt in a pleasing pattern. Tuck the leaves under the roses. Pin each one on so they stay while you hand sew or glue the flowers onto the shirt (see the end of this post for my tips on this).
Each flower will have to be sewn to the flower next to it so that they don't stretch and pull apart when the shirt is worn. I just did a few stitches through the sides of the flowers to connect them together.

This is the longest step!!


After sewing on all of the flowers you will end up with a beautiful rose shirt like this one!


There are so many other color combos that would look wonderful!


It is perfect for fall with my maroon "leather" jacket and brown boots.


Just FYI

When you are going to do a shirt refashion, make sure that the shirt is exactly what you want before you start to add embellishments. I started this project with a very plain $5 Old Navy tee. Once the flowers were on they looked a little too fancy for the shirt. The neck was also very large so the white undershirt gaped out and looked funny. This shirt isn't too different, but it gathers a little at the neck, has the 3/4 sleeves, and has a small neck opening. It was also $5 from Shade.

If you choose to use fabric glue to attach the flowers, beware! I used it before to attach flowers on this shirt and it worked fine. However, on the rose shirt it made a big mess. The glue was running so I grabbed the nearest thing I had to wipe it up with, which just so happened to be a piece of red cardstock. Yikes. Needless to say, there is a pink stain on the back of that Old Navy tee. Not to mention that the shirt was stiff.

After these messes, I pulled all the flowers off and hand stitched them to the Shade shirt. This entire process took me several months to complete so that is partially why I am so excited to share this! It's FINALLY done!

I will be linking up to many of these parties. Please check them out!

Saturday, October 30, 2010

Happy Halloween from Rosie the Riveter!

This year for Halloween I dressed up as the Rosie the Riveter "We Can Do It" poster. I am so excited about this costume!
It was simple, cheap, and partially homemade (we made the poster and Mom made the bandana) but I feel that it is the most creative costume I have ever had!

We added this jack-o-lantern face to our orange wall for our Halloween party and took fun pictures in front of it.

The poster is made to strap to my back so I can take it off when needed.


My husband dressed as a Spanish conquistador.


Happy Halloween!


Friday, October 29, 2010

Pumpkin Bracelet

I hope everyone is having a great Halloween season! I have been busy with parties and projects. I cannot wait to show you my costume!!! Yesterday I shared some ideas for pumpkin decorating if you missed it. Today I have another blogger's tutorial to show off.

Have you seen the tutorial for these darling candy pumpkin bracelets over at Brown Paper Packages? I loved this idea! I used it for the Halloween project in my crafts class at school. Below are some of the bracelets that the students made.


Thanks Kierste for this fun tutorial! The girls loved it!
BTW, I have another shirt refashion coming pretty soon!! It's FINALLY almost done!

Thursday, October 28, 2010

Pumpkin Decorating Ideas

All of these fantastic pumpkins were made by young teenagers. They did all the work themselves using a few provided materials or what they brought to school from home. They are so talented and creative!
This pumpkin has been painted white, then she made this beautiful design with pink, black, and grey paint.

Painted black for day time use, and his favorite logo carved in for nighttime use.


Cute stripes with jewels on top.


Halloween ribbons and other embellishments attached.


A white pumpking painted black and red. When it is carved you can see the white inside.


An orange pumpkin painted with black to look marbled.


Painted different colors and then she used a handmade stencil to paint on the words.


These monster eyes were made from colored paper and attached with paper clips. She wanted to use pipe cleaners but forget them at home. What creativity to use what she had!


Spray painted black with Halloween colored designs. Tied with a bunch of really cute Halloween ribbons.
I love creating with kids! Be sure to check out the linky parties!

Wednesday, October 20, 2010

Halloween Necklace

I made this necklace for mom as per her request (aka she is the designer). When I was finished I realized that I should have taken pictures and written a tutorial. However, if you have basic jewelry making skills you should be able to create one if you desire.
Connect the large black and orange beads together with eye pins. Attach them to the desired length of chain. Stack the small orange and black beads on head pins and attach them to the loops between the big black and orange beads. Attach a clasp on the end you have a cute, fun Halloween necklace! I love how the dangles look like spider legs!

Happy Halloween!


What I Wore

I still want to participate in "What I Wore" Wednesday but rather than just list where my clothes came from and what they cost, I would like to write about the creativity behind my outfits and what inspired me to wear something, combine two pieces, etc.


I hope that's not too cheesy, but I love to read fashion blogs where I can gain inspiration and outfit ideas. I really feel that clothes are a way that I can create every single day, even if I don't have time for crafts, photography, or music. I can still be creative and express myself.


This outfit was inspired by those amazing, rockin' shoes! I picked those babies up at the thrift store for $4 last week. They are pointy toed, beaded, sequined heels. They remind me of the shoes worn by Drew Barrymore in my favorite movie Ever After and I just HAD to have them! I also just made the belt and wanted to wear both things at the same time. But how to do it?


I chose to wear this blue tank top because it has a few sequins at the neckline to coordinate with the shoes. I have had it FOREVER and finally wore it again- hooray! I paired it with my new favorite sweater. It was the perfect outfit to match my belt (this one is mine, but you can purchase your own from my shop).


I just love this outfit! My mom made me this skirt several years ago and I wore it with green until I made this gorgeous purple shirt that matched perfectly. I wore this outfit last winter, but with my new found belt obsession, it just feels complete. (I hope my belt wasn't crooked like that all day!)


My husband and I were going on a Halloween boat ride on a local river and I needed something toasty warm to wear. A scarf is the perfect thing so I matched this outfit to the scarf I chose. A plain tee is the perfect background for the scarf, and the gray boots match nicely.


It looked great with my new coat too! I added a beanie and some gloves and was perfect!


Another example of my belt obsession. If a belt is too big to fit up high on your waist, use an eyelet punch from your craft supplies to make another hole.


This outfit may not seem like much to you, but it is the result of some serious remixing. I have had the green sweater (a hand-me-down) for some time and have worn it with jeans, black pants, and gray pants. I have tried black shirts and white shirts under it. New to my wardrobe this season are the gray sweater and little green belt so I added them. I love the layered look for fall and again with the belt obsession!


Thanks for reading! I would appreciate any comments and feedback you have on the quality and content of this post!

Monday, October 18, 2010

Halloween Jar Lanterns


I finally got around to doing a Halloween craft! My mom found the idea for these cute jars in the Taste of Home magazine. They are candle holders- like jack-o-lanterns but they will last longer!


To make your own keep on reading!

Supplies:

Variety of jars

Tissue paper

Mod Podge

Any other embellishments you wish to use.


My mom did all the work of gathering and washing our jars.


My mom bought orange, black, green, purple, and white tissue paper. I also used a little red and I thought yellow would be cute to make a moon and stars.


Cut your tissue paper to be a little bigger than the size of the jar. You need some to tuck inside the opening and some to flatten to the bottom.


Cover your jar with a light coat of Mod Podge.


Quickly cover the jar with your tissue paper. Make sure you tuck it inside the jar.


Decorate the jar as desired using more Mod Podge. A PDF of the jack-o-lantern faces can be downloaded at http://www.tasteofhome.com/lantern


Put another coat of Mod Podge over the entire jar.

Cute, right? Be careful with the ink from the faces. If you put more than a VERY light coat of Mod Podge on the faces they will smear. If this does happen, wash the jar in the sink and the tissue paper will dissolve and you can easily wash the jar clean.

Here is a photo of the bottom of the jar so you can see how to fold the tissue over.


For the striped jars, we cut strips of tissue paper using a paper cutter and attached them individually to the jars.


For the spider jar (see below for finished product) I cut a spider body and 8 legs from black tissue paper and attached to the jar. After I took this picture I added a red hour glass to make a black widow.


These are the jars my mom made. She did mostly faces and I love how they turned out. She has since bought several cute Halloween ribbons and tied the jars with ribbon.


These are the jars that I made. The one furthest to the right is supposed to be a candy corn.

Now, add a tea light candle and voila! a cute Halloween lantern. My mom and I are both having Halloween parties and will be putting our jars on our food tables for added decorations.

Thank you Taste of Home for the idea!

Speaking of Halloween....

I am going to take this opportunity to make a shameless plug for my cute Halloween headbands available in my Etsy shop. If you order this week, I will make it a priority to ship ASAP (within one or two business days) so you can wear it the week of Halloween. If you aren't a fan of the lace, you can order it without that embellishment.
Click here to purchase!


Linking up to these parties. Please check them out!
 

©2011 All Rights Reserved | Website Designed by Website Design Credit

Powered by Blogger