Menu Home About Tutorials Style Shop Buttons

Thursday, March 8, 2012

Quilled Birthday Card


I recent made this super cute birthday card using some quilling techniques. I adapted the idea from this book that I checked out from the library.


The flames are quilled and so is the smoke. The candles are made 3D with foam tape. The wick is a small peice of black paper just glued on.


It would be really cute to have the card say "Make A Wish" or something but I ran out of space.

Do any of my readers do paper quilling? Leave a link to your projects in the comments... I wanna see!

Thursday, December 8, 2011

Quilled Christmas Cards

Remember when I got my quilling kit? I have been playing with it and made a few Christmas cards. If you like paper crafts you should really try this art form!


You can find the original instructions and inspiration for these first three designs here.

This little baby was my own design and creation. When I first made Rudolph, his antlers were a lot smaller. Dear husband, who was sitting next to me the entire time I was working on it, asked if it were an alien. I might have thrown it at him. I was so proud that I had designed my own quilling pattern.... and it looked like an alien!!!! I have since added bigger antlers and announced it is Rudolph to anyone I have shown before they can ask or guess.

While slightly time consuming, quilling is super fun. Try it!

Thursday, August 12, 2010

Disney Week: Magical Birthday Card

This is a project that I did back in June for card club (which I am no longer a part of so I won't have any more card club cards to show you). I don't think it is fabulous and it is very simple so I never posted, but it fits with the theme of this week so here ya go!

First, you need to make your Mickey. I used a hole punch to cut the large circle and a stencil for the small ones. Remember that if Mickeys head is the size of a quarter, his ears should be a dime.


I used a variety of colorful papers that reminded me of a party.


Cut your cards from cardstock.


Cut a peice of your patterned paper that is about 1/4" smaller than the card on all sides.


I downloaded a Disney font HERE and typed the phrase "Have a Magical Birthday" in Word. I printed it off and cut it out the size I wanted.


You could add more detail to make it more fun and more "crafty." I had to make 12 of these cards so I kept them simple.


I hope you have enjoyed my little Disney week! Feel free to add your own tips in the comment section of any post. Also, if you have a Disney post of your own, add a link in the comments so that others can see what you have done.

Friday, June 11, 2010

A Bridal Shower

This week my mom and aunt (and I helped a little too!) put on a bridal shower for my sister-in-law to-be. Every shower is a masterpiece with these two! They create fabulous buffet tables.


For this shower, they chose a red geranium picnic theme- perfect for summer. Notice the neutral table cloths that help the red flowers pop.


To create the levels, put a table cloth on the table, then place Styrofoam wedges and/or sturdy boxes around the table. (These Styrofoam wedges were created, I believe, from a flat screen TV package. Good way to recycle!)


Next, put a matching table cloth over the wedges and boxes. Place your matching dishes on the wedges and flat part of the table. We usually weave some kind of greenery or garland around the dishes. Sometimes we use tea light candles in the spread to add some atmosphere.


Doesn't it look beautiful? The large water jug on the end really adds a lot (I think this one is from Costco.) This leaves the hostesses free from having to refill water pitchers and doesn't make too much mess. (Just make sure you have a dish under the jar to catch any spills.)


Mmmm..... yummy desserts! Mini cupcakes, fruit pizza squares, and daisy sugar cookies. (I made the cookies, but my cute sister-in-law decorated them for me.)


I think a good plate rack is a must-have for entertaining. Not only does it look nice, but it saves space on the table so you can fit more.


A candy station is a great way to do party favors. Find candy in colors that match your theme in put them in clear glass apothecary jars. Provide bags or boxes with a thank you message so that guests can create their own cute favors.


Some of us like shower games, and some of us don't. We decided to do one game for this shower and it turned out great! (This was my main contribution to the shower.) It is a candy bar matching game. Guests draw a slip of paper with a wedding phrase on it. They have to match that phrase with the candy bar that describes it. If they are correct, they get to keep their candy bar. It gives everyone a prize!

Butterfingers- first date interactions
Pay Day- Wedding ring purchase date
Twix- Bachelor Party pranks
Mounds- gifts
Big Hunk- groom
Sweethearts- the bride and groom
Lifesavers- parents
Sugar Daddy- Father of the Bride
Runts OR Jr. Mints- Flower girl and ring bearer
100 Grand- the reception
Fast break- leaving the reception
Zero- Post wedding bank accounts
Rocky Road- the first year
Airheads- bridesmaids
Ring pop- wedding ring
Symphony- first dance
Hot tamales- the bride
5th Avenue- dress shop
Treasures- wedding photos
Almond Joy- Happily Ever After
Kisses- You may now kiss the bride
Three Musketeers- groomsman
Twizzlers- tie the knot
Nerds- In-laws (only works if in-laws are giving the shower!)
Bliss- wedded bliss
Goobers- friends who decorate the car
Whoppers- the bill for the wedding

For my gift, I created a basket of kitchen items in the bride's kitchen colors- red and black. I used a red dishpan and filled it with dish towels, a pitcher, oven mitts, a juicer, measuring cups, and a spoon rest.

I wrapped it in cellophane and tied it with a variety of red and black ribbons.


I made a black and white card and put the bride and groom's initials on the front of it with red stickers.


It was a great shower. My mom and aunt do awesome work!

Friday, May 21, 2010

Red Rose Wedding Cards

Please excuse the not-so-great photos. I made the cards right before the club met and it was already getting dark when I tried to take pictures.

I decided to go with a wedding theme for card club this month. I cut a small black card from cardstock, and covered it with a black and white patterned paper.
I then made the roses from red cardstock using this tutorial I have linked to before. I don't draw the spiral, I just cut it and round the corners off.

I cut a green leaf from some handmade paper I had in my stash, and attached the roses to the cards.

I also had a lot of these cute little metal wedding sayings I had been given so I could attach them to the cards at no cost.


I am very pleased with how they turned out. They are pretty, cheap, and not time consuming. (I made 10 of them in less than 2 hours.)

What should I make for next month's card club? I should get started early this month!

Giveaway!!!

I want to give away one of the new headbands I have been making. BUT I want to reach 200 fans on Facebook first! I am currently at 172 fans so I only need 28 more. Become a fan if you want to be able to enter the contest!


Monday, April 5, 2010

Fabric Rose Cards

I am in a card club in which we get together once a month and exchange handmade cards. Below are my cards for this month (actually last month because I missed the March get together). It was a dismal snowy April day and I was needing some bright colors!

I think this one will be for a my sister-in-law to-be's bridal shower. Her colors are pink and orange. I always make one card for myself to keep.


This one looks like Valentine's Day. Oh well.


They were so easy I don't think a photo tutorial is neccessary, but here's some step by step instructions:

1.Make card from card stock (cut an 8.5" x 11" paper in half and fold).

2. Cut colored paper a little bigger than half the height of the card and attach.

3. Trim ribbon to the width of the card and attach. (I usually just tape it inside the card the lazy way.)

4. Make fabric rose (here is a tutorial).

5. Stick the brad through the rose and hot glue if necessary.

6. Hot glue the flower to the card.

7. Affix stickers or stamp in the bottom right corner.


A few of the places I am linking up to!

Making

DIY Day @ ASPTL


Tuesday, January 19, 2010

My first card!

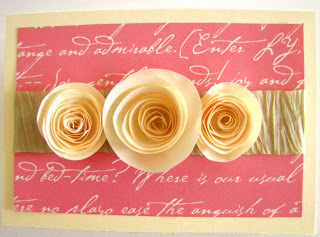
I have added my first card to my Etsy shop! I have been making cards for years and have finally added one to the inventory list. It is perfect for the upcoming Valentine's holiday, or can be used for a wedding, anniversary, new baby girl, etc.!

Click here to view it in my shop.


Would you like to make your own card? Click on this tutorial for step by step instructions on how to make the flowers.

Watch for my first headbands in Etsy coming later this week too. I also have a couple of other projects up my sleeve but they are birthday gifts so I can't post them until after the gifts have been given!


©2011 All Rights Reserved | Website Designed by Website Design Credit

Powered by Blogger