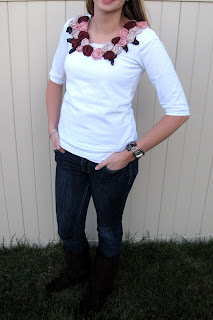
 I am so excited to share this next refashion project with you. I am in love with this beautiful rose shirt that I just finished.
 It was inspired by this "Telocote Tank" by Anthropologie, which is no longer for sale.
Materials:
Plain shirt
Your choice of fabric and colors
(I used 1/4 yard each of maroon, beige, and pink for the flowers and a small amount of brown for the leaves. This fabric is 100% polyester and kind of shiny.)

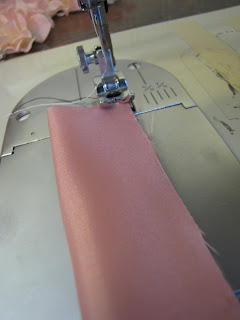
Cut 2 1/2" wide strips from the flower fabrics. Fold in half and stitch a seam down the side. (If you are using a fabric with a pattern, make sure that wrong sides are together for this step.)

As you can see, I didn't even use matching thread because it won't show. I don't rethread my machine if I don't have to!

Using a pencil to help if needed, turn the sewn fabric inside out (or outside in!) to make a long tube. This is done to prevent the fabric roses from fraying. They will also look thicker.

Roll up each tube of fabric to make a rose. Use fabric glue or a needle and thread to secure each one.
For the leaves cut a few 4"x4" squares from the brown fabric. They do not have to be straight.

Fold in one corner to the center...

and then the other.

Pinch the end together to hide the edges and make a leaf shape.

Stitch the ends together to finish the leaf. They won't show so they don't have to be perfect.

Arrange the flowers on your shirt in a pleasing pattern. Tuck the leaves under the roses. Pin each one on so they stay while you hand sew or glue the flowers onto the shirt (see the end of this post for my tips on this).
This is the longest step!!

After sewing on all of the flowers you will end up with a beautiful rose shirt like this one!

There are so many other color combos that would look wonderful!


It is perfect for fall with my maroon "leather" jacket and brown boots.

Just FYI
When you are going to do a shirt refashion, make sure that the shirt is exactly what you want before you start to add embellishments. I started this project with a very plain $5 Old Navy tee. Once the flowers were on they looked a little too fancy for the shirt. The neck was also very large so the white undershirt gaped out and looked funny. This shirt isn't too different, but it gathers a little at the neck, has the 3/4 sleeves, and has a small neck opening. It was also $5 from Shade.
If you choose to use fabric glue to attach the flowers, beware! I used it before to attach flowers on this shirt and it worked fine. However, on the rose shirt it made a big mess. The glue was running so I grabbed the nearest thing I had to wipe it up with, which just so happened to be a piece of red cardstock. Yikes. Needless to say, there is a pink stain on the back of that Old Navy tee. Not to mention that the shirt was stiff.
After these messes, I pulled all the flowers off and hand stitched them to the Shade shirt. This entire process took me several months to complete so that is partially why I am so excited to share this! It's FINALLY done!
I will be linking up to many of these parties. Please check them out!


